
Today I’m sharing a dress I made last month. We took a somewhat last-minute trip to Carmel and Monterey and I decided to make a very last-minute dress to wear. I had purchased 2 1/2 yards of this cute undersea themed fabric from Birch and hadn’t quite figured out what to make with it. I finally decided the weekend before or trip that I would try the Chemise Dress from Gertie Sews Jiffy Dresses. I had juuust enough fabric to cut it out (and I actually had to make it a smidge shorter to get both pieces to fit). I really needed it to be jiffy since I only had a few nights after work to get it sewn up!
I didn’t really have time to do a lot of fitting, so this ended up being kind of a wearable muslin. I have been really interested in trying out the Nancy Zieman fitting method because it seems like a relatively simple and quick way to make alterations. She has you start by measuring from armpit to armpit to find your “True Size” based on that measurement. In theory, this size will be the best fit for your shoulders, which is the most difficult area to fit. You then use the “pivot and slide” method to enlarge or reduce the bust, waist, and hip of the pattern as needed and move darts up or down. This pattern was my first try of this fitting method and I think it worked pretty well. I often find that when I choose a pattern size that fits my bust that I end up with a lot of extra room on the shoulders and upper back. Over time I’ve learned to size down and do a full bust adjustment, but it’s still a bit of a guessing game as to what size exactly I need to go down to and I usually have to make at least a couple of muslins. So if I could streamline that process a bit I am definitely for that! According to Nancy’s method, since my measurement from armpit-to-armpit is 14 inches, I should start with a size 14 and then adjust the bust and waist from there.
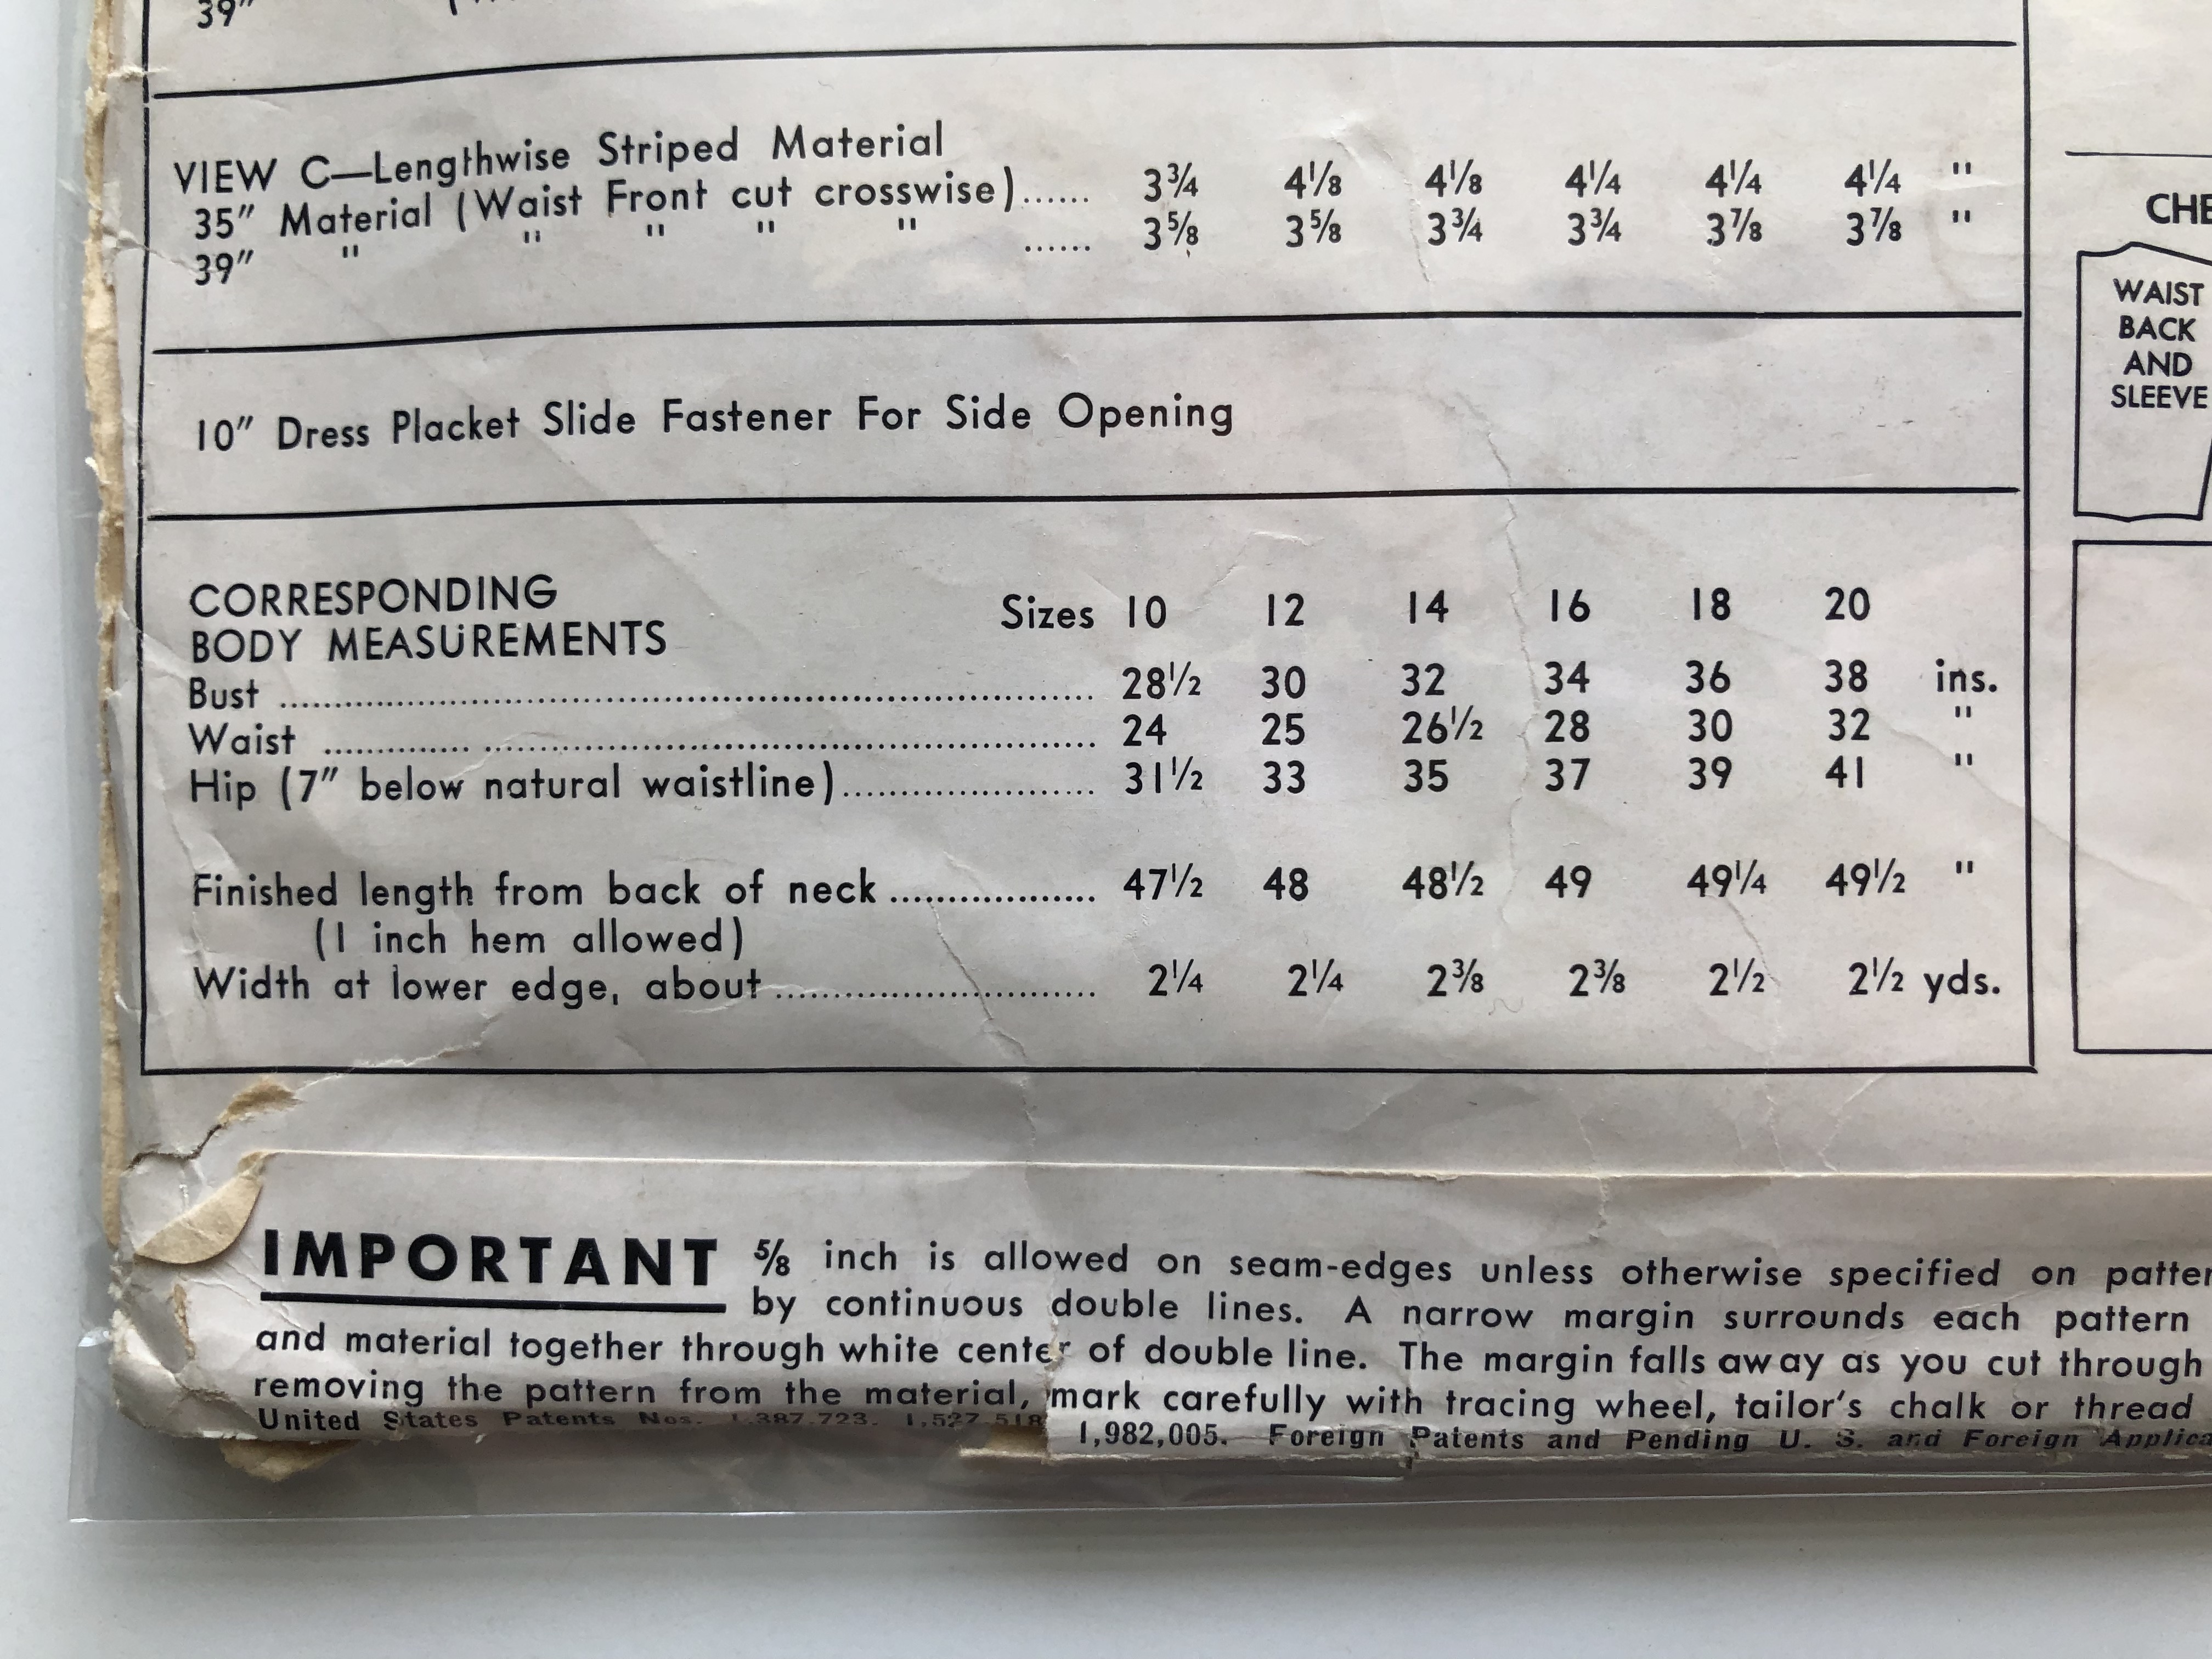
One aspect I was a bit confused about was using this method with non-“Big 4” patterns. I have a big collection of vintage patterns that I am eager to try out whose size charts differ from those of the modern “Big 4.” For example, a modern size 14 on the Simplicity pattern shown below has a 36 inch bust, 28 inch waist, and 38 inch hip. I found this to be the same on all of my modern Simplicity, McCall’s, Butterick, and Vogue patterns. As far as I can tell Nancy does not address this specific question in her book.
To illustrate, here’s a modern Simplicity size chart:

Now, here’s a vintage pattern from the 1940’s. You can see the size chart is completely different:
And for just a little more confusion, Gertie has her own size chart for her patterns:
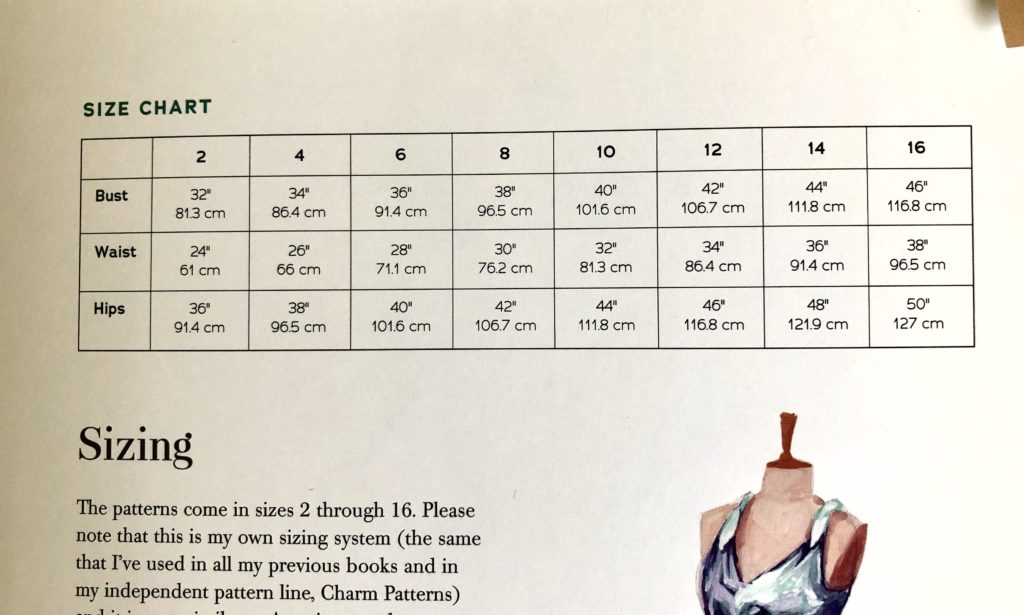
In the end, I decided to just go by the bust measurement when choosing a starting size. Since the “Big 4” size 14 has a 36 inch bust, I will choose a vintage pattern with a 36-inch bust, whatever size that may be (18 in the case of the one shown above) and the size 6 in Gertie’s patterns. I will then adjust from there.
My measurements are 40 inches at the bust, 32 at the waist, and 48 at the hip, so I used the pivot-and-slide method to add 4 inches to the bust and 4 to the waist and then I tapered the pattern out to the size 14 at the hip. I also dropped the bust dart down by 1 inch. I then traced out a new pattern and just went for it! The resulting fit wasn’t too bad. I did feel like the shoulders were still a teensy bit too wide, and I ended up taking in the hips by about 3 inches. But overall it wasn’t bad. I want to try out a few more patterns with this method and I promise to report back with my findings!
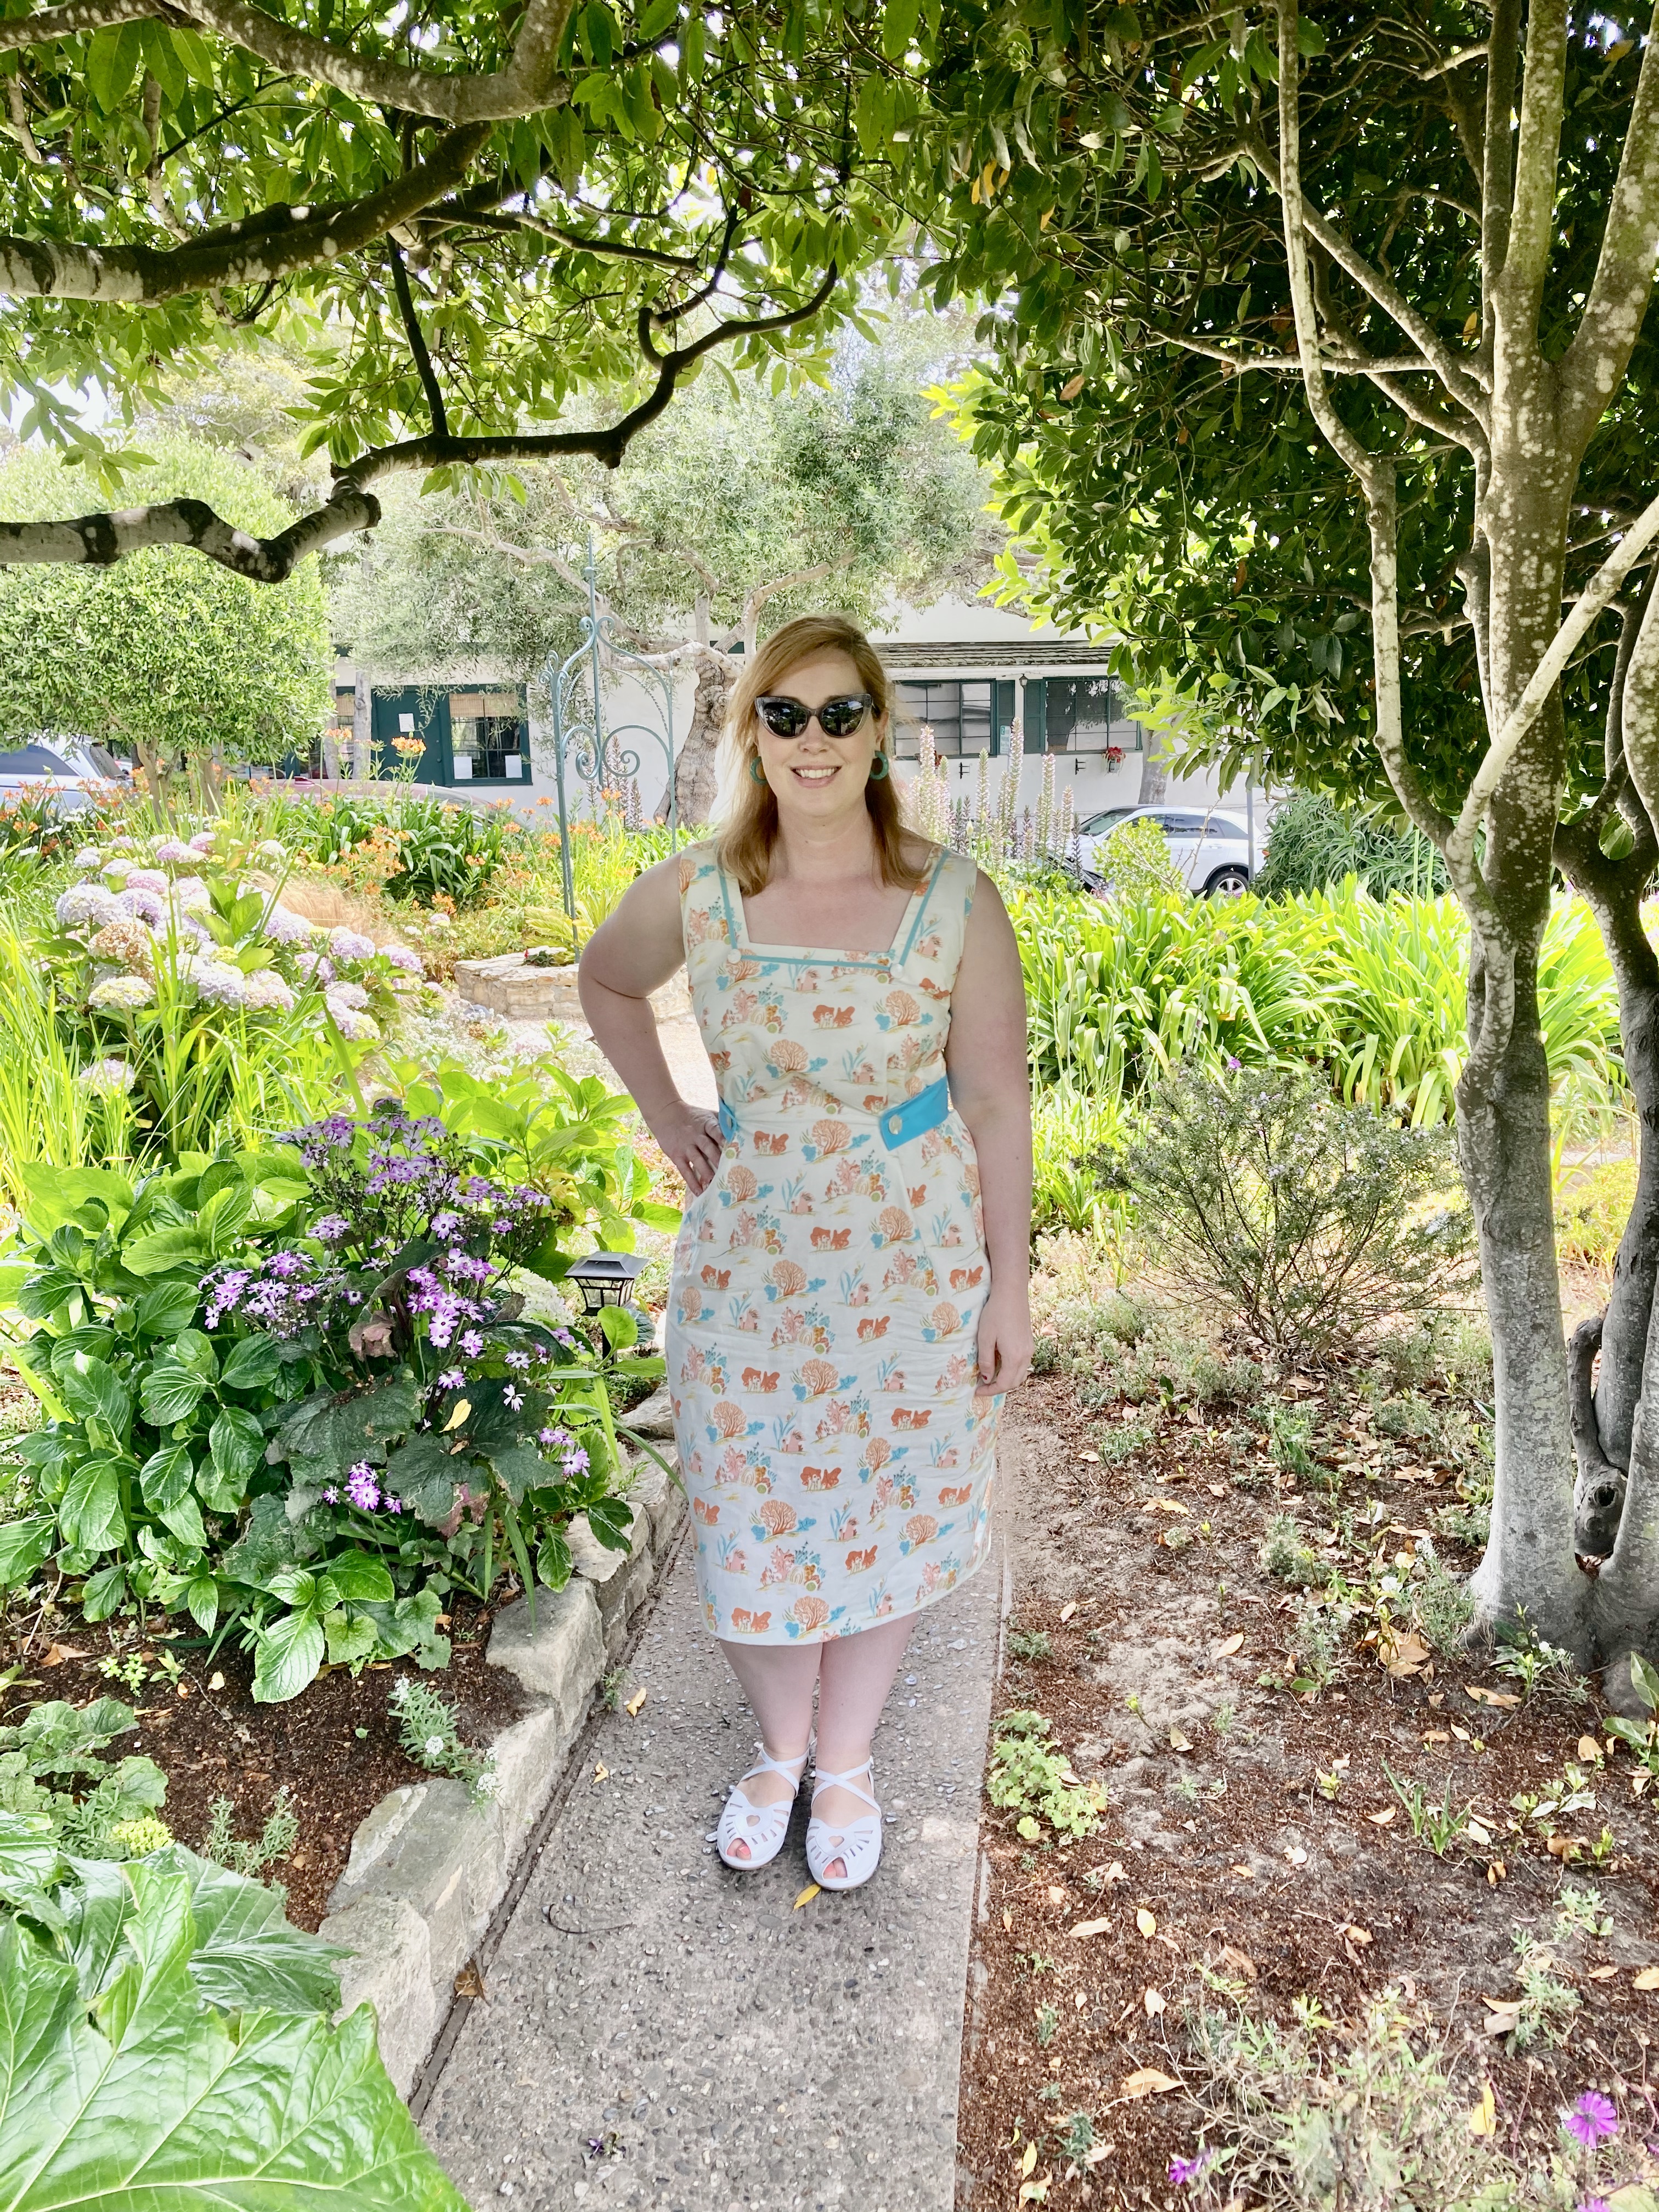
Here’s a picture of me actually wearing it out and about in Carmel. I was pretty comfortable for a warm day, though the fabric did get wrinkled from sitting in the car. It’s a quilting cotton which I know isn’t always the best for apparel, but I just love the print and the color scheme!
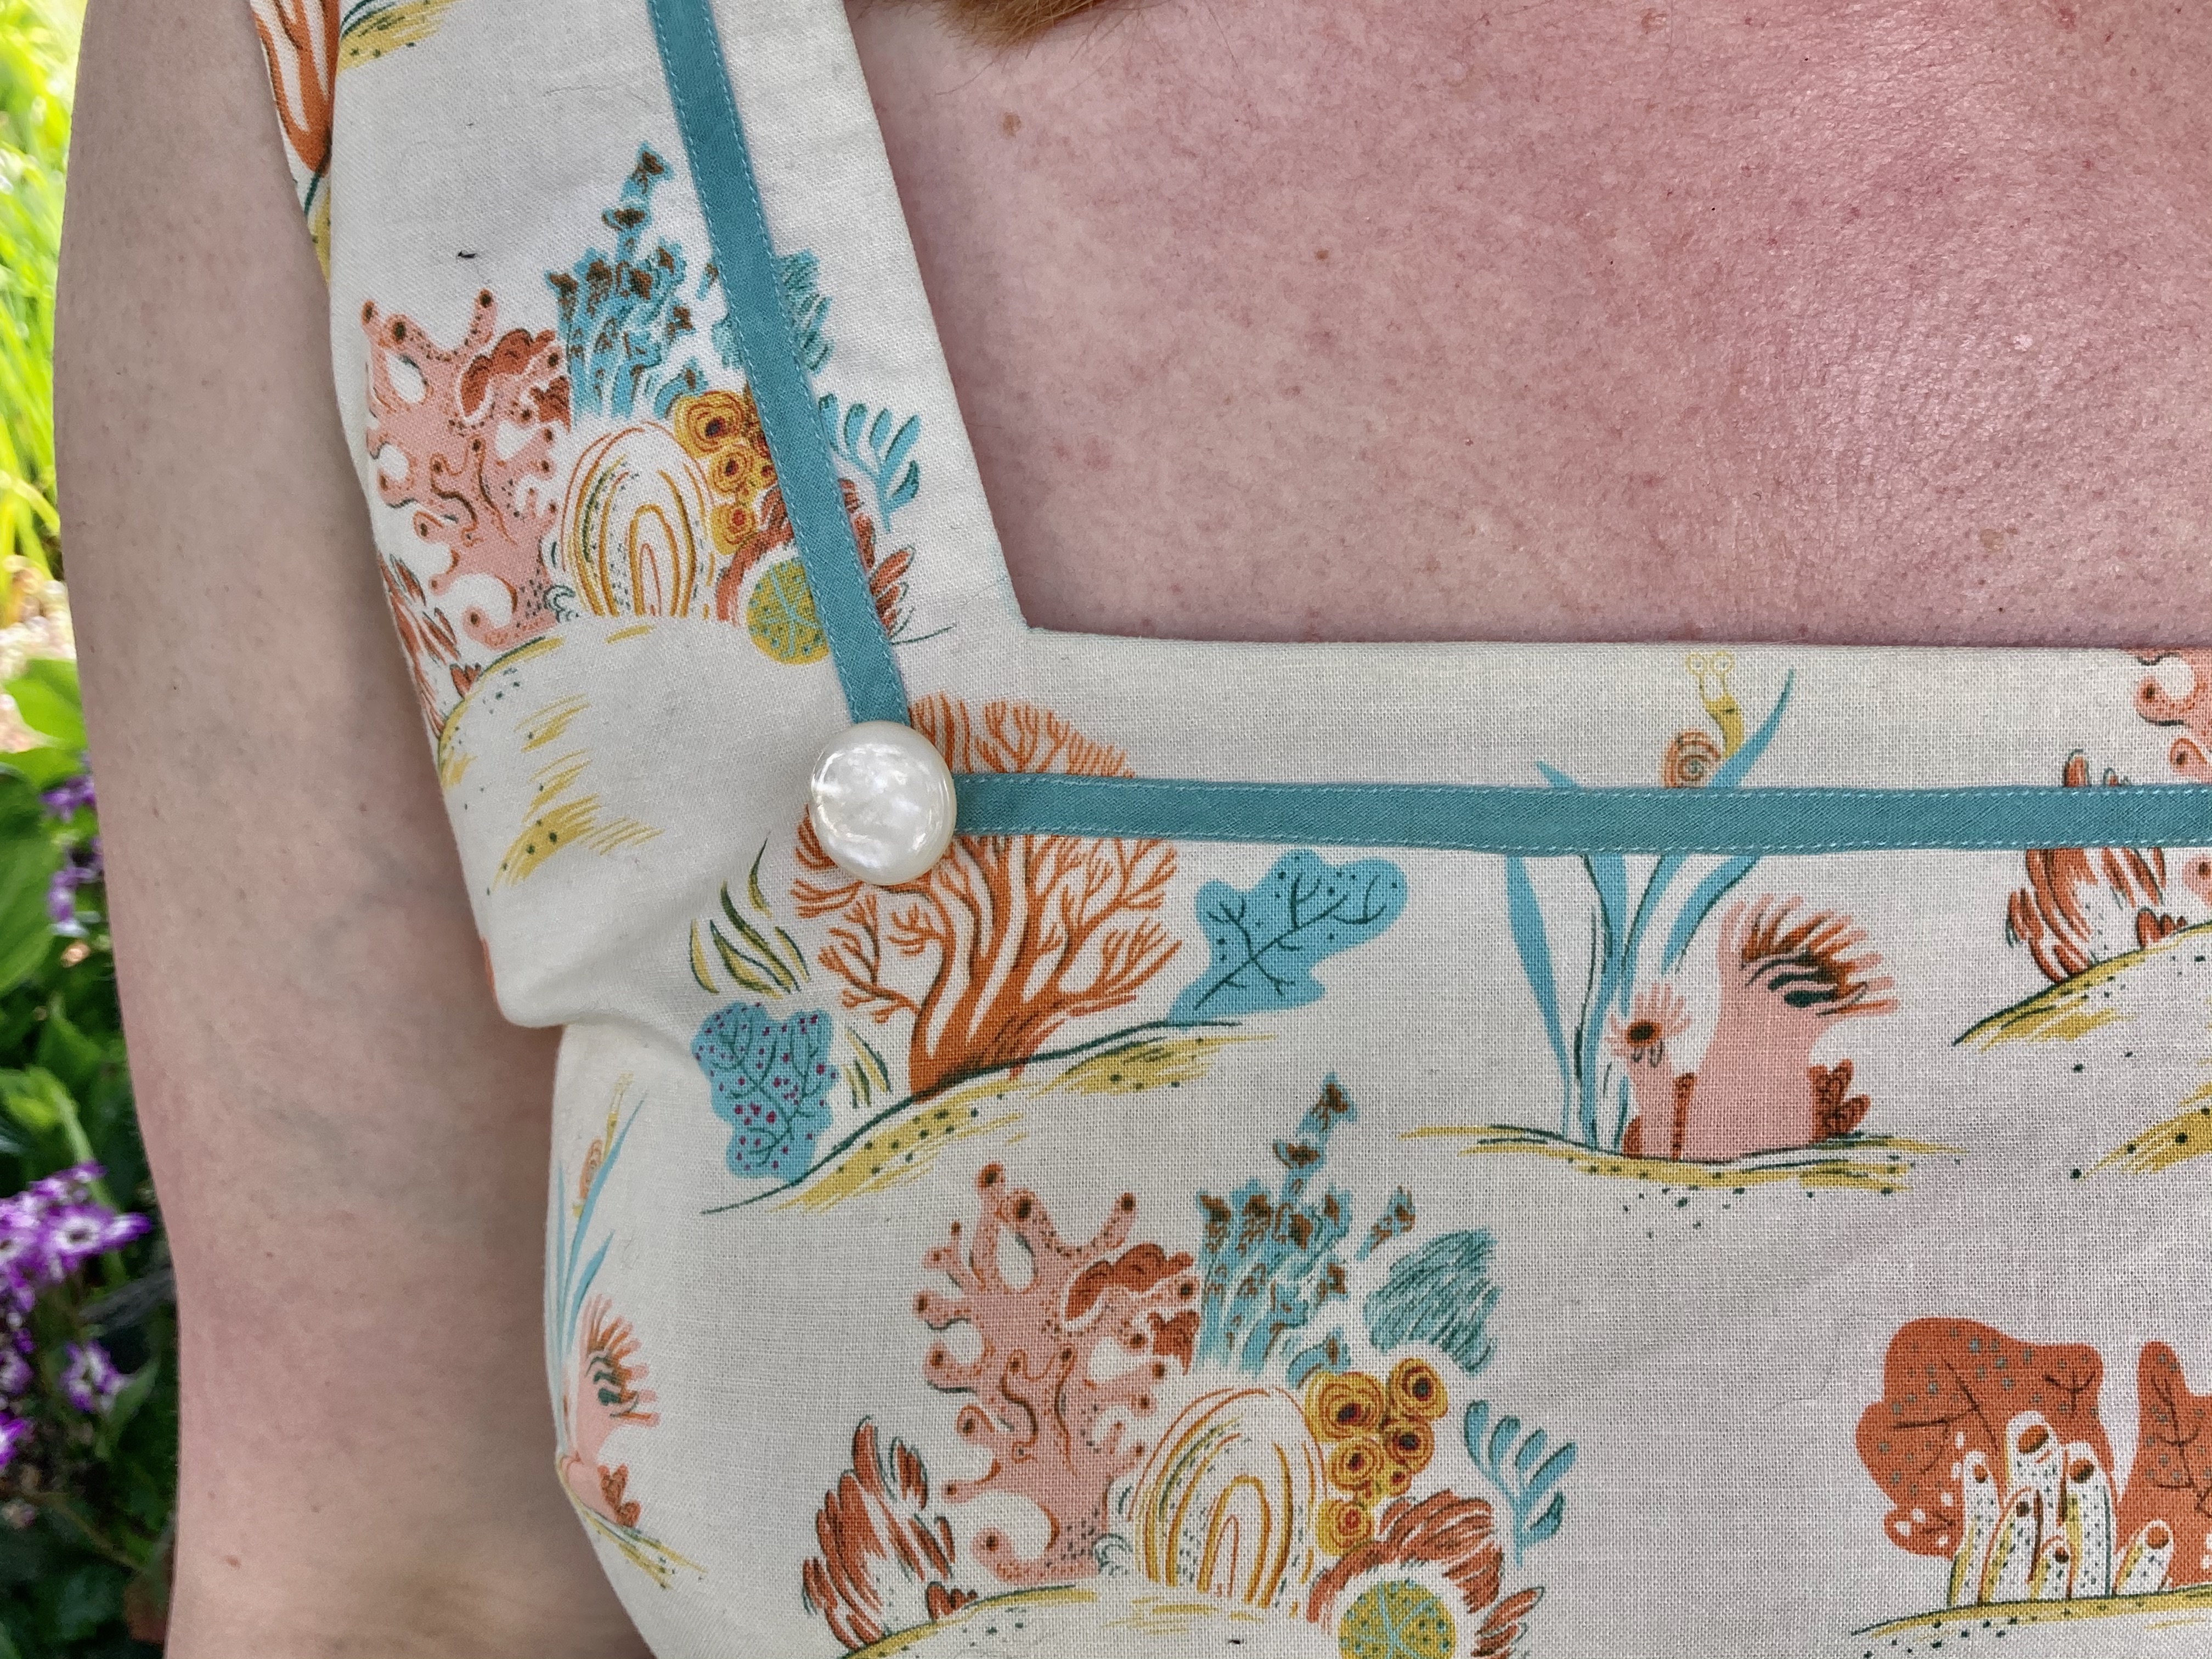
I decided to add just a little more interest with some coordinating bias tape trim and shell buttons from my stash.
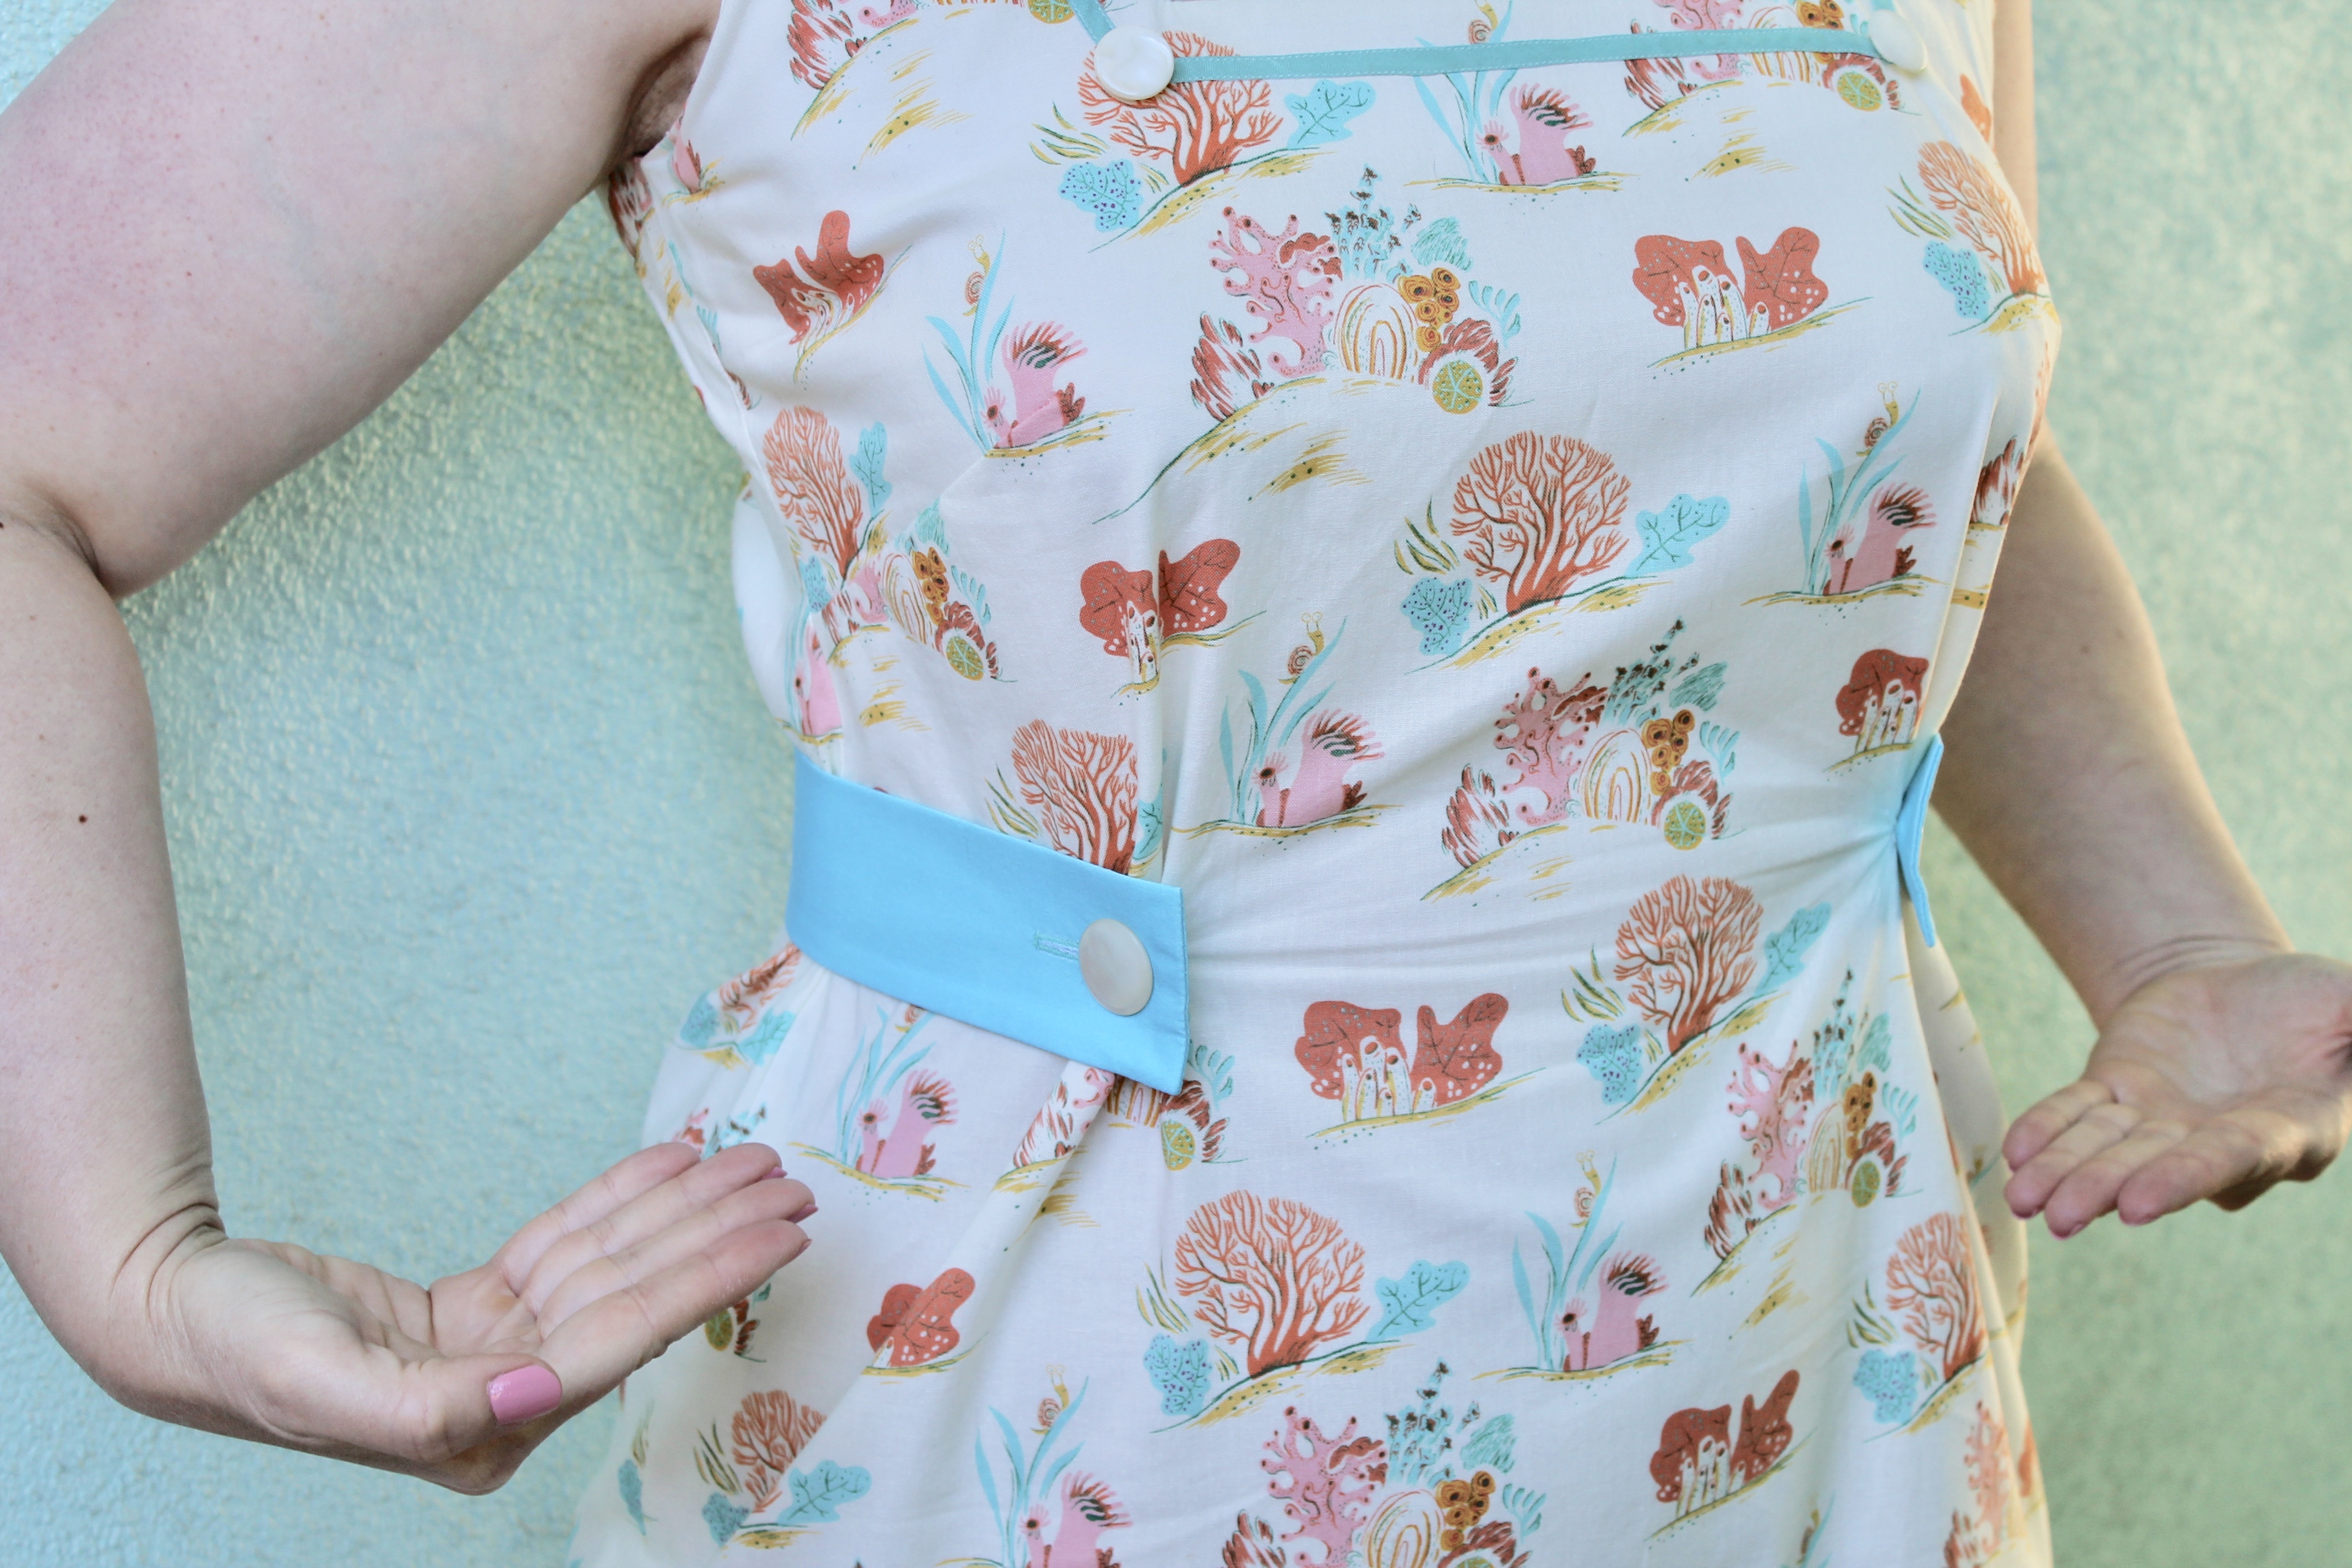
I also decided to add the button-on belt for some waist shaping and used more shell buttons. I reinforced the inside with some fusible interfacing.
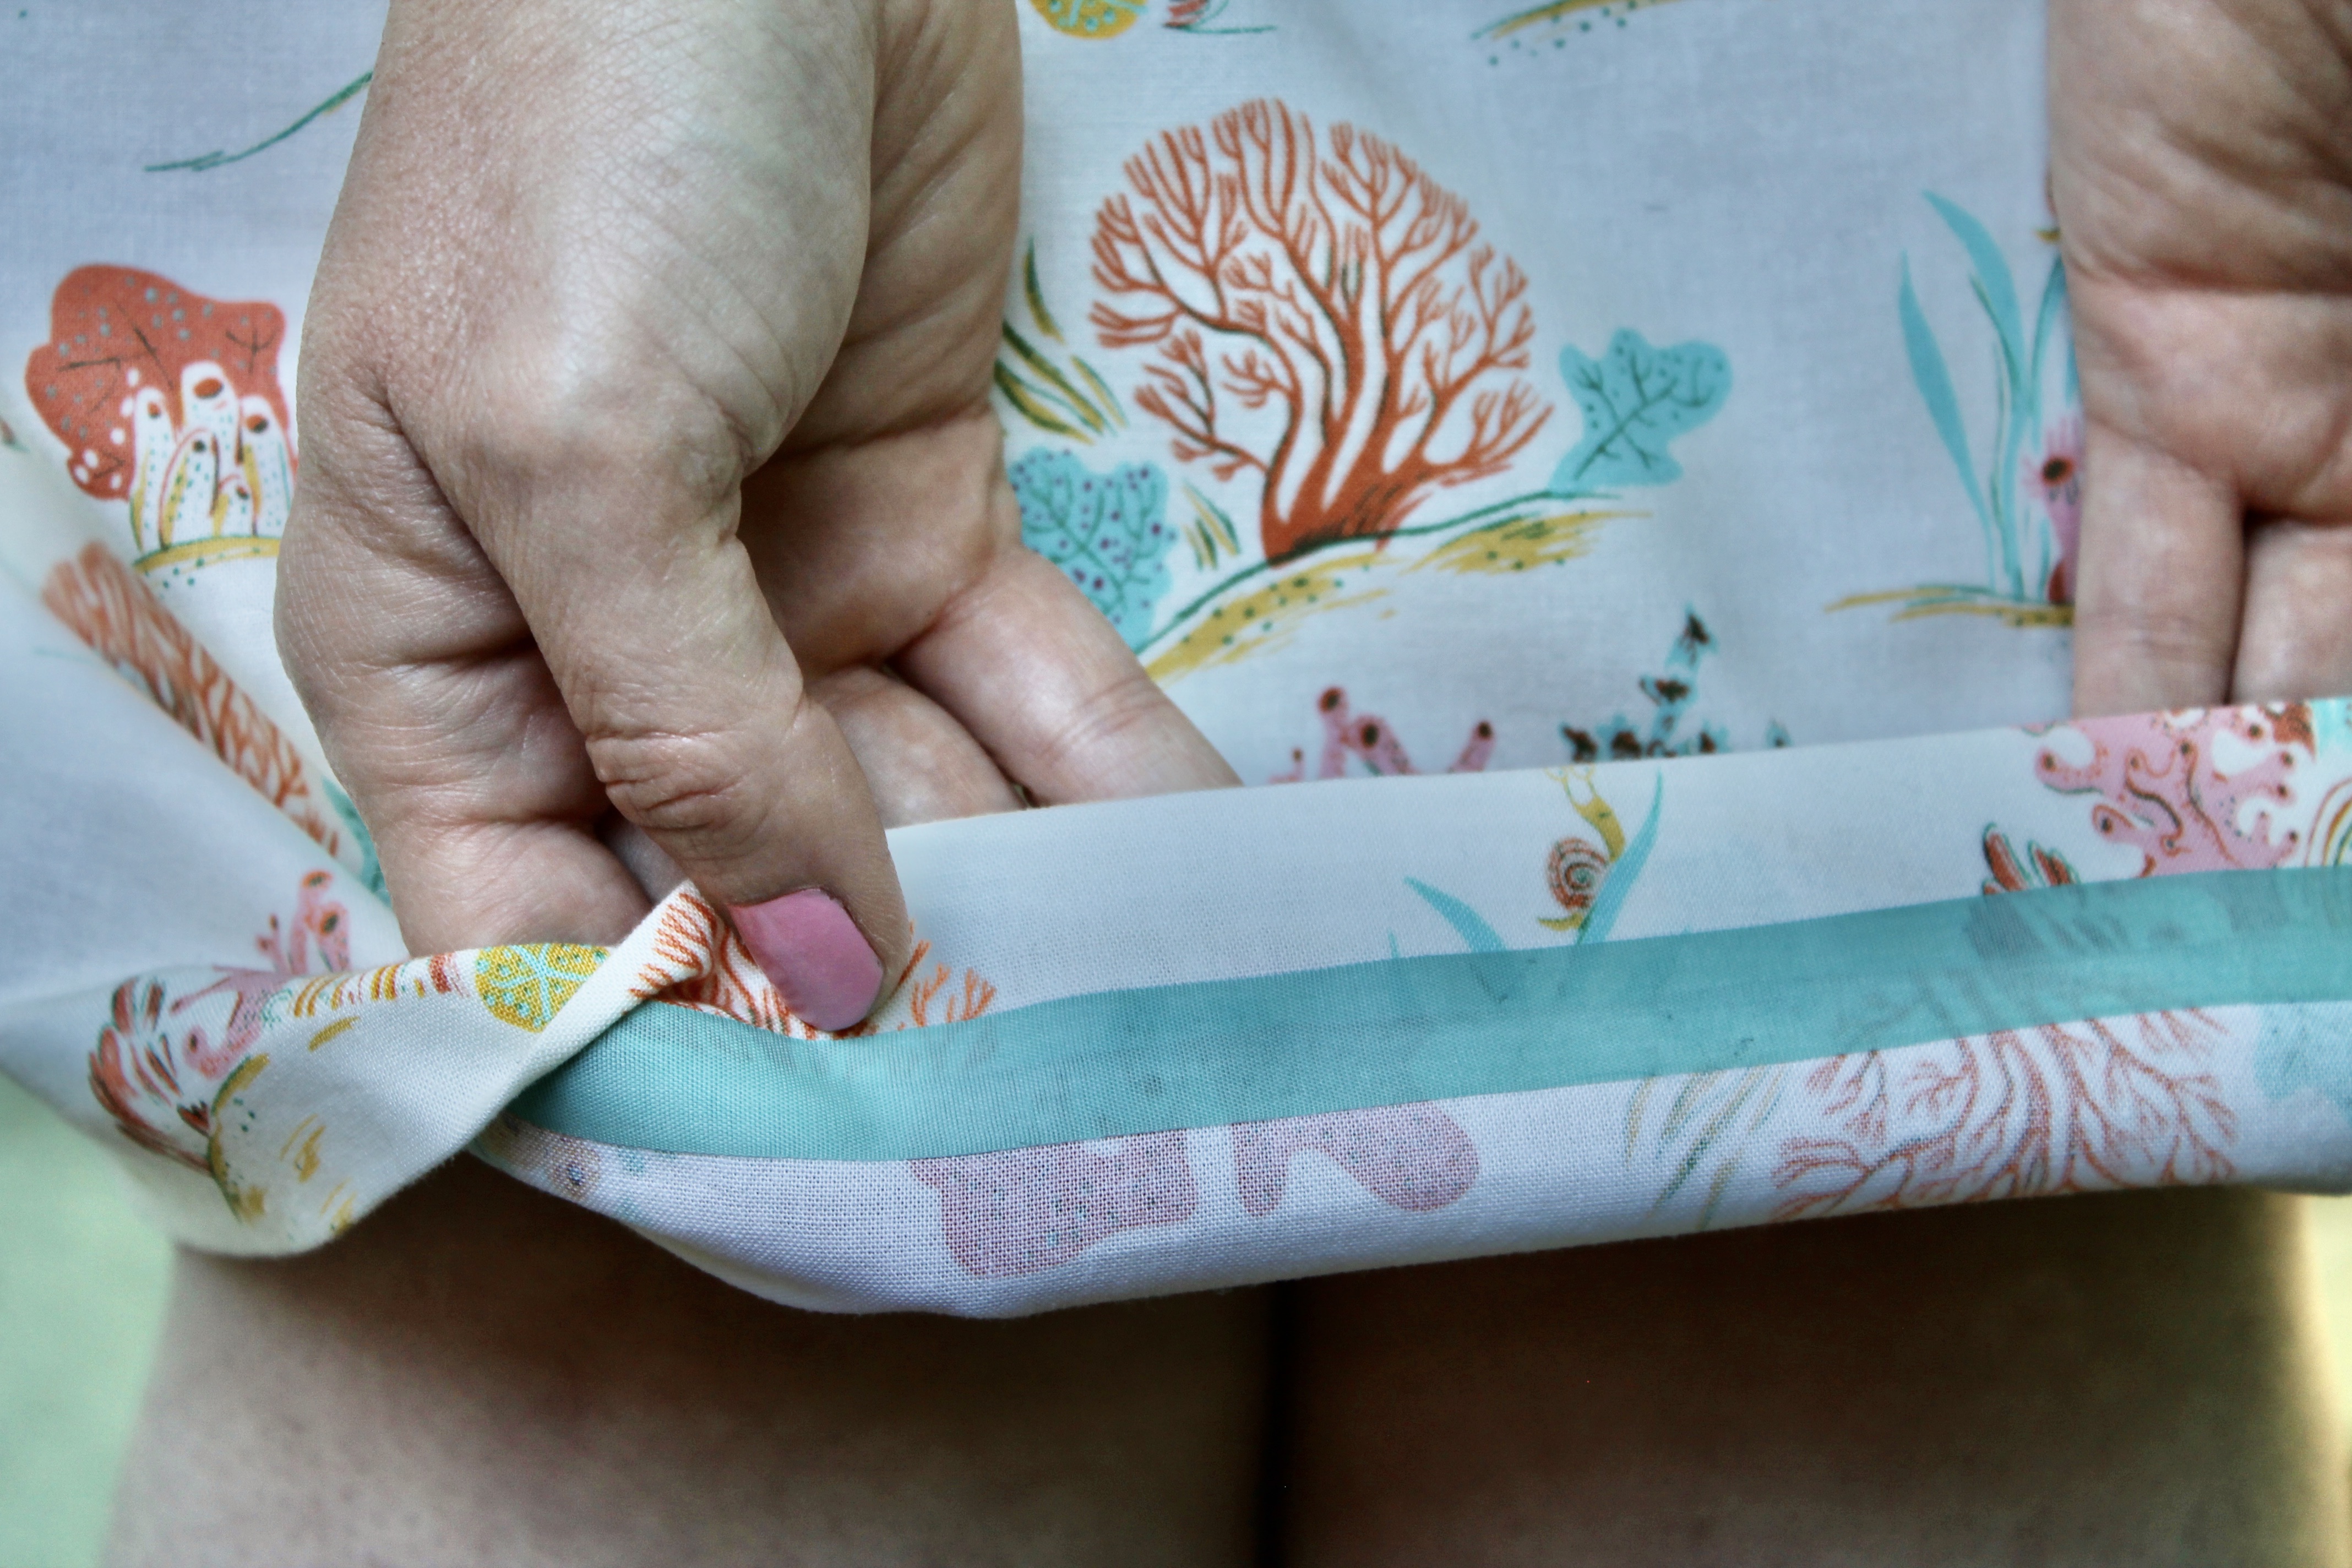
I also tried fusible webbing for the first time to hem it the dress and covered it with some aqua hem tape. It was definitely a lot quicker than sewing it, but we’ll see how it holds up in the wash.

Pattern: The Chemise Dress (Square-Neck Version) from Gertie Sews Jiffy Dresses
Fabrics: Windham Fabrics Malibu Coral Peach
Trims/Notions: Bias tape for neckline trim, vintage shell buttons (you can find all of of these these online, or at antique/thrift shops)
Size: 6 with a pivot-and-slide alteration (based on Nancy Zieman’s method)
Skill Level: Beginner/Intermediate
Has anyone else tried the Nancy Zieman fitting method? What did you think?

