Hi guys! I’m back today with a recent sewing project. Our friends’ wedding on Catalina Island gave me the perfect reason to make a few new dresses to wear. I decided to make a new dress for each of the three days we were there and make them all in an ocean/nautical theme.
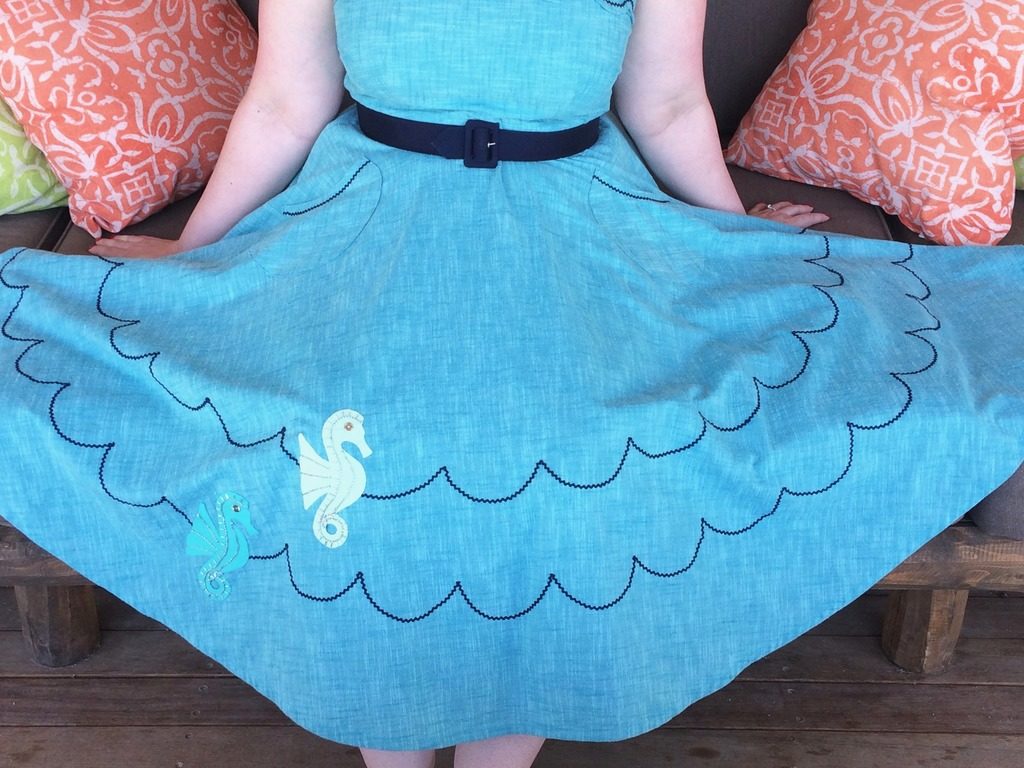
I got my inspiration from the photos of this vintage dress from Cheshire Vintage (it sold awhile back). I loved the scalloped trim and the two rows of fish. I looked online for fish appliques but couldn’t find anything I liked, so I decided to make my own. That’s when I had the idea to make seahorses instead of fish, to move them to the skirt instead of the bodice, and to make them two different colors. I also decided to make my dress in more ocean-y colors, though I do love the contrast of the maroon and white of the inspiration dress!
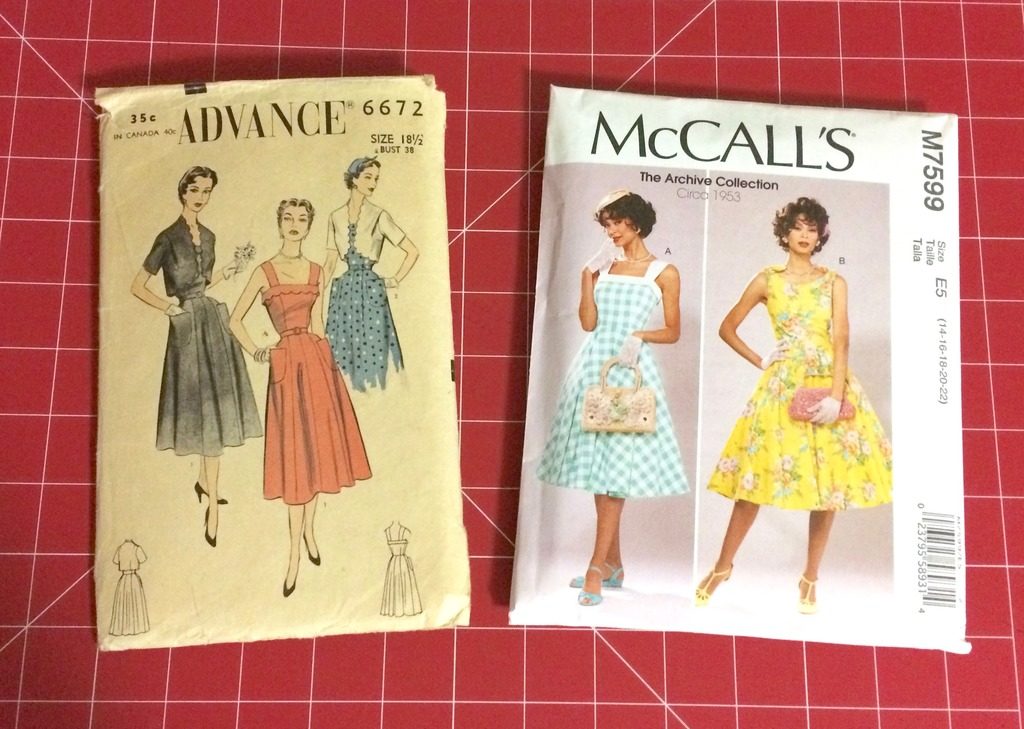
I’d been really wanting to try out this vintage Advance 6672 pattern and I thought the scallops on the bodice would be perfect to go with the wave scallops on the skirt. I started the somewhat laborious process of grading the pattern up to my size when I realized that the re-issue McCall’s 7599 was really similar, and had a full circle skirt (which I was going to substitute anyway). So in the interest of time I decided to just used the McCall’s pattern but add scallops to the bodice band.
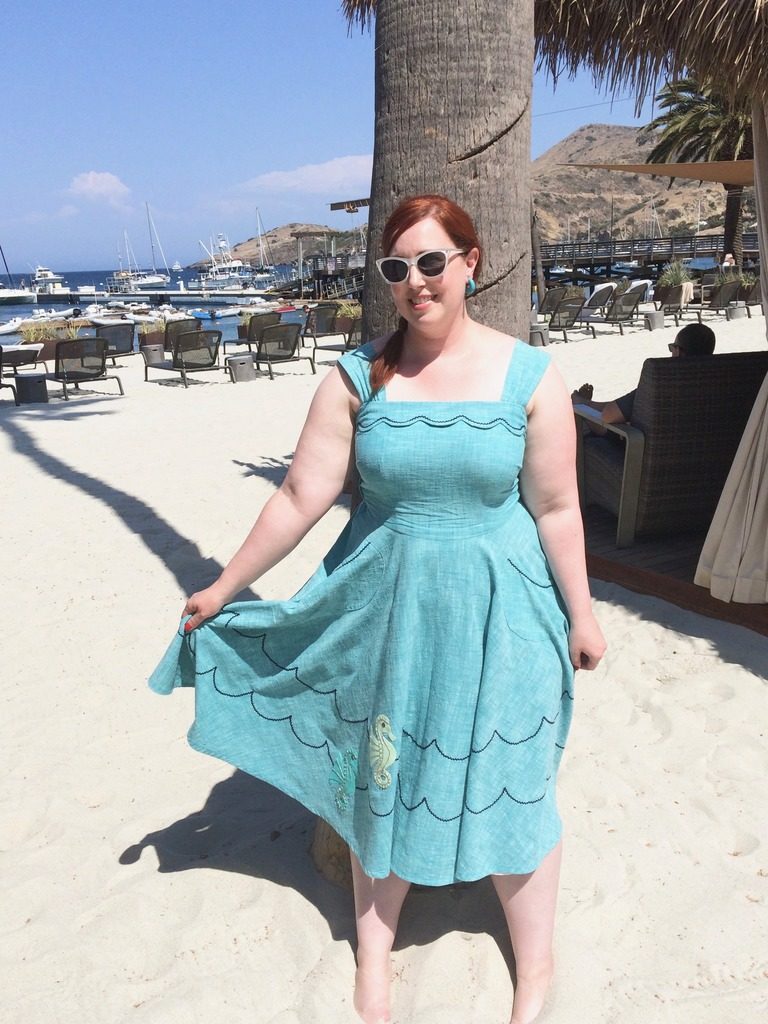
This project was definitely one of those fussy ones that takes a bit of trial and error. I had a lot of trouble getting the bodice to fit my bust properly. Fitting is one of those things I still struggle with and I really want to learn more about (especially since I have kind of a hard-to-fit body). I was thinking I needed to do a full bust adjustment, but I ended up just lowering the darts by a couple of inches, making the darts bigger and adding some length to the bodice front. It took me quite a few tries to get that right and I had to just throw out my first dress altogether (it was a wholly unflattering mess). At that point I almost scrapped the whole project, but decided to order some new fabric and start over after I had some time to regroup. Luckily I got it to work this time and I learned something about fitting my body that should help me next time around.
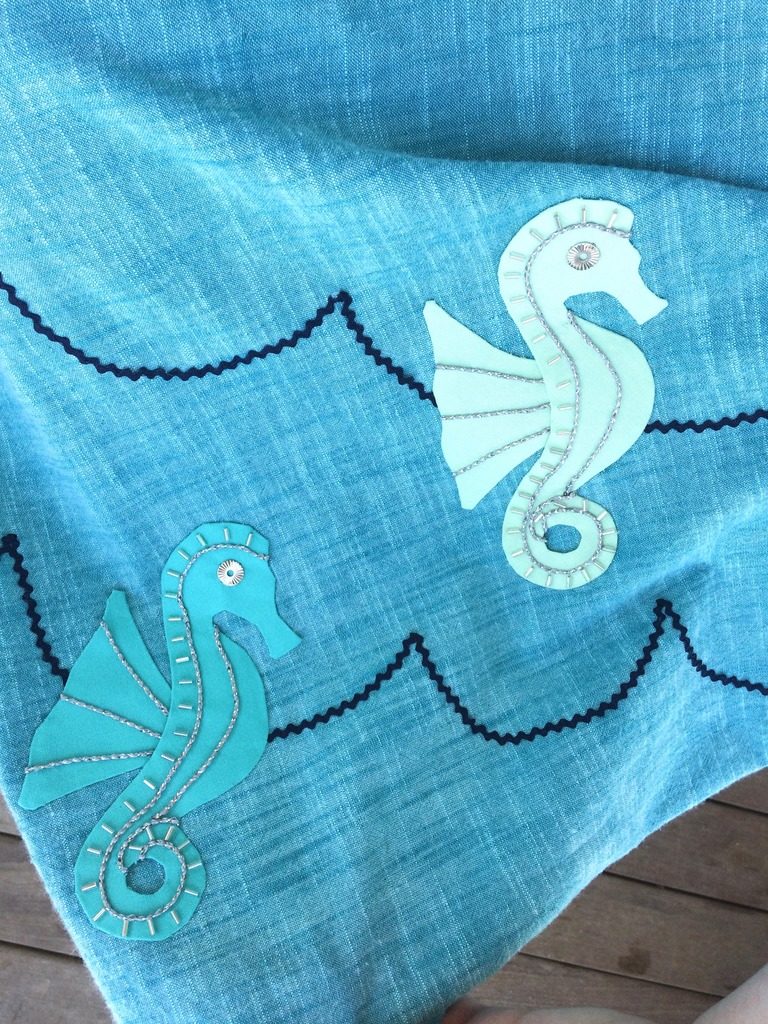
I chose this Robert Kaufman cotton Manchester. I absolutely love the look of textured cottons like this one! They’re perfect for vintage-style dresses and look similar to a lot of fabrics you see from the 1940s-60s. The only thing I didn’t like was the amount of pilling that appeared after I washed and dried the fabric.
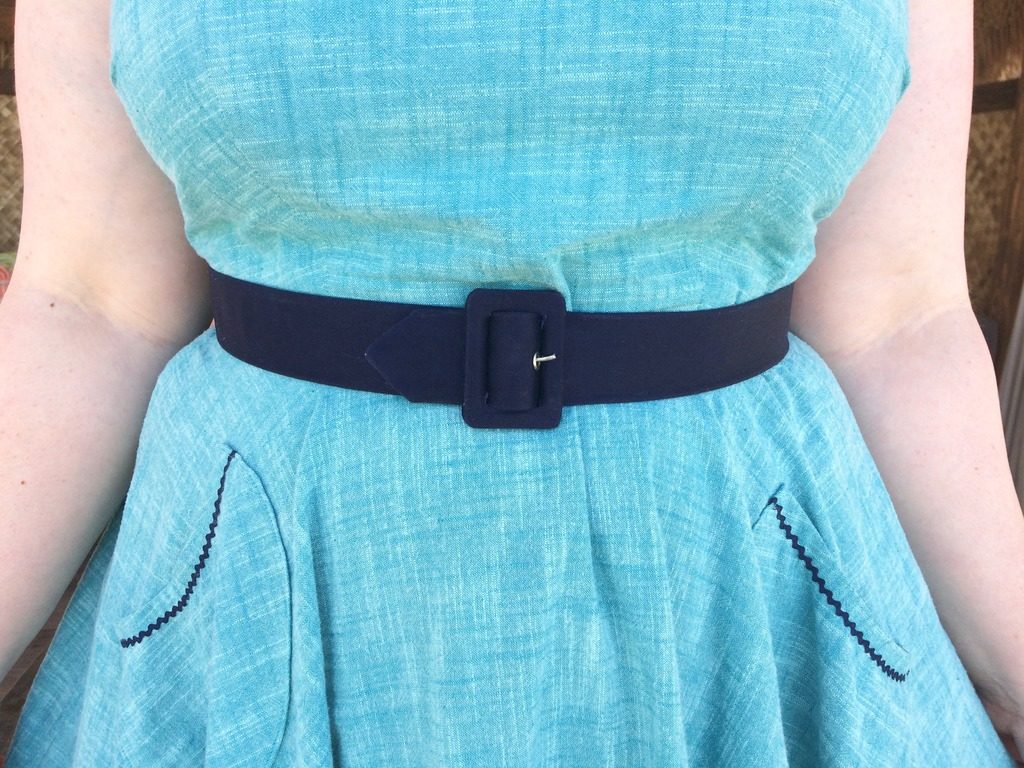
I decided at the last minute to add a contrasting belt to kind of finish the outfit. When I say last minute, I really mean it- I was finishing the belt in the car on the way down to Long Beach! I think the addition of the belt helps give it the right vintage look as well as making my waist look smaller.
 I also added some round patch pockets which I trimmed with rick rack as well. They ended up a bit crooked somehow so I need to remove one and try to sew it on better!
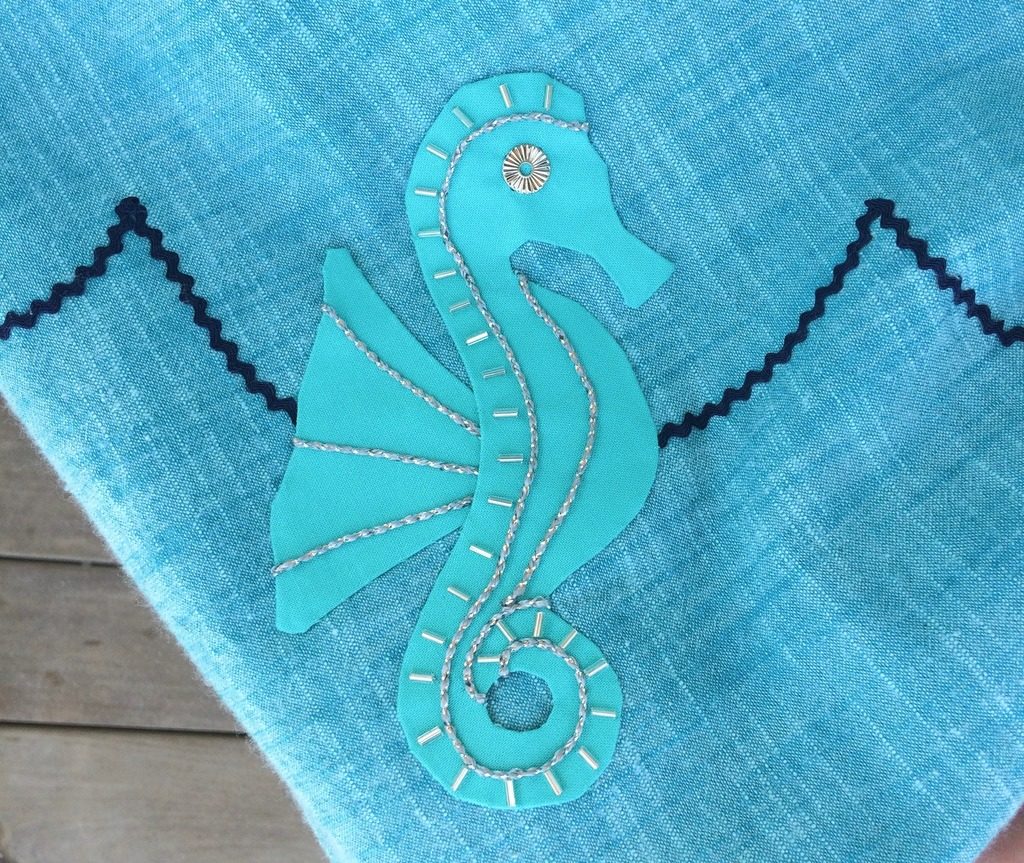
The seahorse appliques were somewhat time-consuming (but then again they’re kind of the focal point of the dress!). I experimented a bit to figure out the best way to make these and had to throw away a couple of the first iterations. I ended up using wonder-under on one side of the fabric, then tracing the seahorse design onto a piece of interfacing which I then ironed to the wonder-under. Then I trimmed around the shape, leaving about a 1/4 inch allowance. I cut lots of notches, and then carefully folded over and ironed the fabric onto the interfacing, bit-by-bit (the wonder-under is key to getting it to stay).
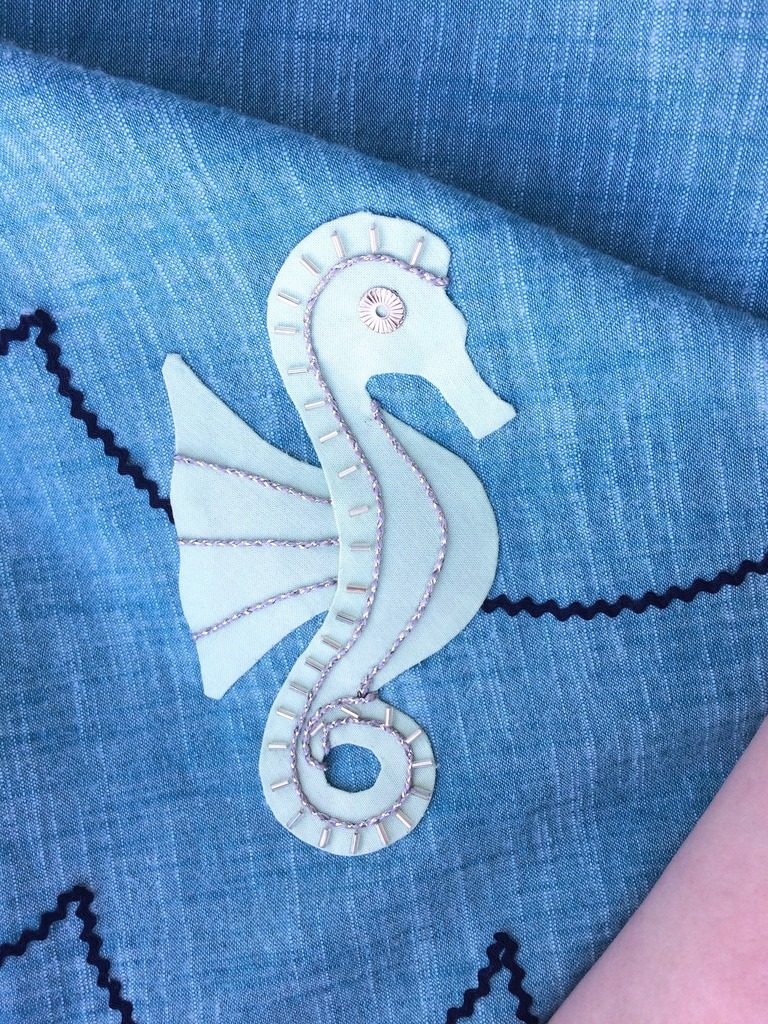
After I had the seahorse shapes made, I hand-sewed the silver trim and beads on. I found the decorative grommets in a bunch of stuff I inherited from my grandma, and they were perfect for the eyes. I then measured up from the hem where I wanted the “waves” to be and drew lines with a fabric marker. I then drew the scallops on. To get even scallops I used the plastic lid of a coffee can. I then hand-sewed the baby rick rack onto the lines I drew and hand-sewed the seahorse appliques onto the skirt. This was definitely the most tedious part of this project and my fingers hurt like crazy after I was done! The only thing I realized I forgot was to add some sequin “bubbles”- I’ll try to put some on before I wear it again.
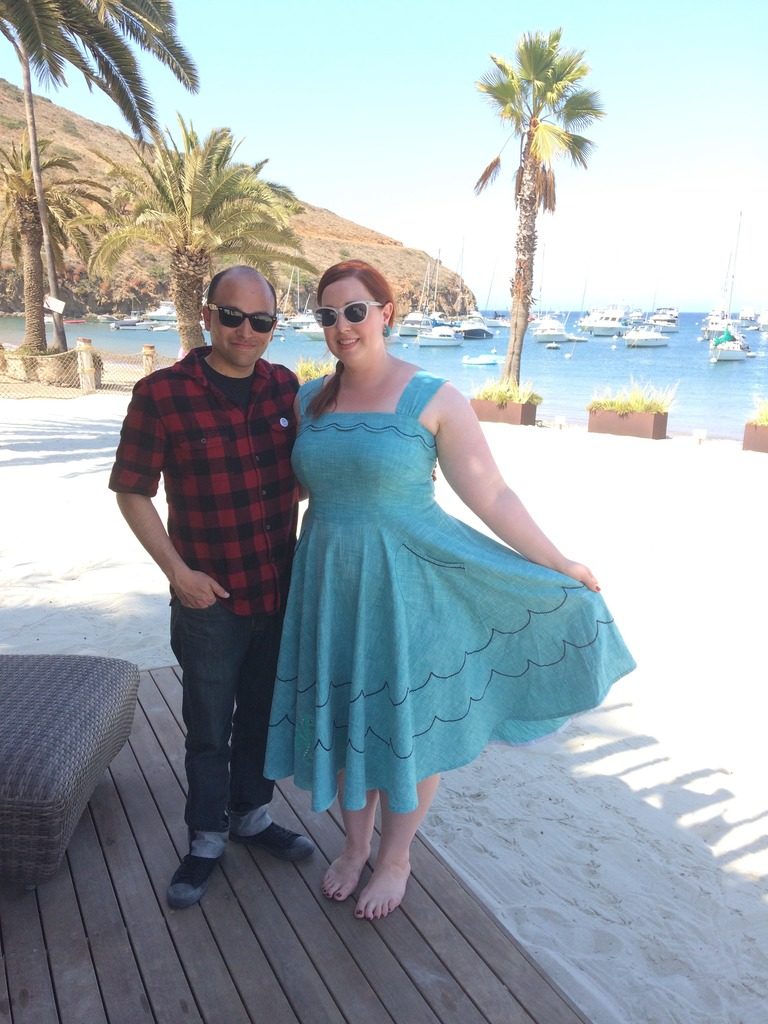
I wore it the day after the wedding to a beach excursion we all went on. Here we are at the Two Harbors beach in the beach palapa our group rented. It was a lot of fun!
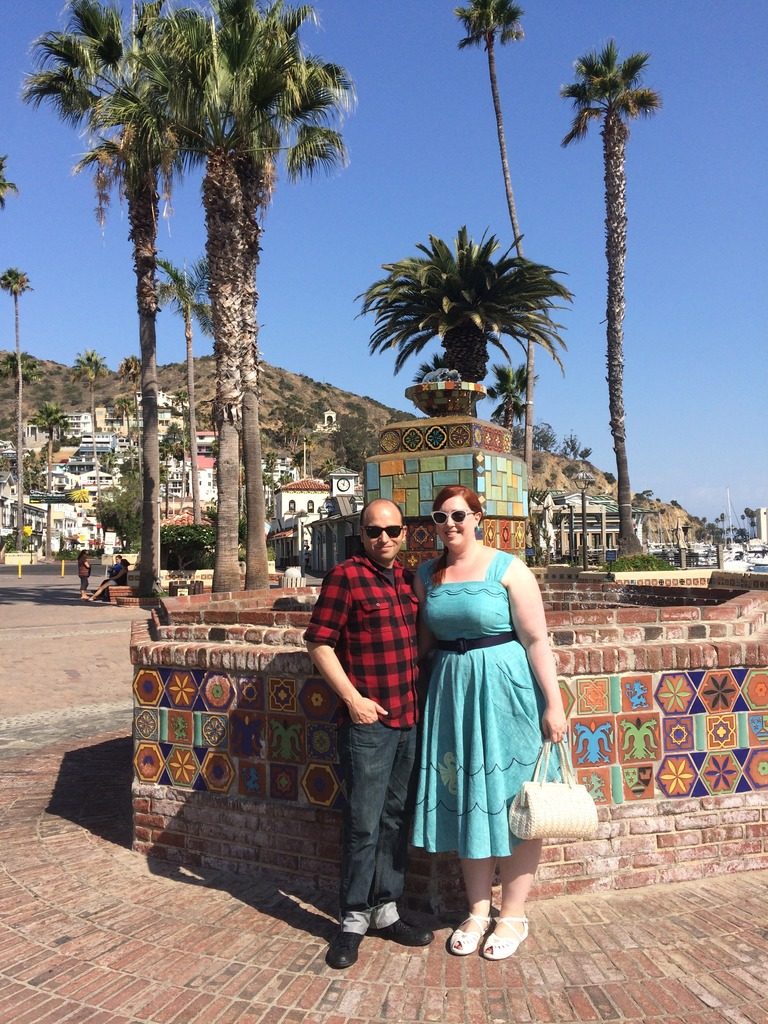
Here’s Phillip and I by the fountain in Avalon. I think it was all worth it in the end!
The essentials:
 Size: 16
 Alterations: Lowered bust darts, added scallops to bodice band. I also didn’t bother making the crinoline from the pattern.
Skill Level: Intermediate
See you next time!




This dress is totally adorable! You did such a nice job with all the details, and I especially like the rick rack you used on the scallops. What is your plan for laundering? Are you worried about your appliques?
Thanks! I'm kind of obsessed with dresses with details 🙂
Thanks! Yeah, I guess it was pretty much the same thing as an FBA, just no cutting and spreading! I really need to get a better grip on fitting issues- I spend way too much time with trial and error before I get it right.
Yep! Small world!
Super cute! My friend was just married on Catalina – I wonder if you were at his wedding? 🙂
(Shane)
I love your vision for this dress! You always seem to come up with eye-catching ideas. And, hey – making the darts bigger and adding some length to the bodice front is basically a FBA anyway! Haha
This is so pretty. You have such great attention to detail! Very nice color on you, and the fit is spot on.